
Sealing your home against pests means systematically closing gaps, cracks, and vents across every room and exterior surface. This room-by-room checklist covers the most common pest entry points—from the kitchen to the crawl space—and explains when professional-grade exclusion methods are worth the investment.
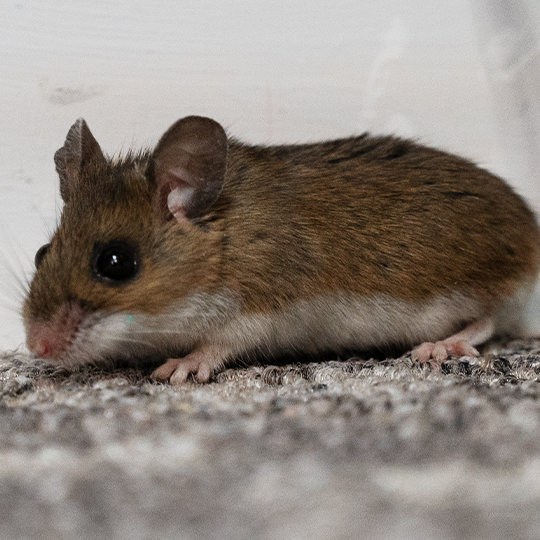
Most pest problems don’t start with a broken door or a neglected trash can. They start with a gap the width of a dime. Mice can squeeze through a hole as small as 6mm (¼ inch). Cockroaches need even less. Once inside, these pests find food, warmth, and shelter—and the infestation can grow quickly before you notice any signs.
The good news? Exclusion works. Unlike pesticides, which kill pests after they’ve already entered, physical sealing prevents entry in the first place. According to the U.S. Environmental Protection Agency (EPA), exclusion is one of the most effective long-term strategies in Integrated Pest Management (IPM). It’s also cost-effective—a tube of caulk costs a few dollars, while a professional extermination visit can run hundreds.
This checklist walks through every major area of your home—inside and out—so you can identify vulnerabilities before pests do. It also covers the situations where DIY sealing isn’t enough and professional-grade monitoring or treatment makes the real difference.
Why Do Pests Keep Getting Inside Your Home?
Pests enter homes for three reasons: food, water, and warmth. Your job is to make access to those things as difficult as possible.
The biggest mistake homeowners make is treating pest control reactively—calling an exterminator only after spotting a cockroach or finding droppings. By then, the infestation is often already established. Sealing your home proactively removes the conditions pests exploit.
Structural vulnerabilities accumulate over time. Caulk dries and cracks. Weatherstripping compresses and loses its seal. Vents corrode or lose their mesh. A home that was well-sealed five years ago may now have dozens of entry points you haven’t noticed.
The checklist below is designed to change that.
Room-by-Room Home Pest Exclusion Checklist
Kitchen: The Highest-Risk Room in the House
The kitchen offers pests everything they need in one place. Food residue, moisture from the sink, and warmth from appliances make it a prime target—especially for cockroaches, ants, and rodents.
Check and seal these areas:
- Under the sink: Inspect pipe penetrations through the cabinet floor and wall. These gaps are often left unsealed during plumbing installation. Fill with steel wool packed tightly, then cover with expanding foam or a pipe collar.
- Behind the stove and refrigerator: These appliances are rarely moved. Check for gaps between the appliance and the wall, as well as any utility lines passing through the wall.
- Cabinet toe-kicks: The kick plate at the base of lower cabinets often has small gaps at floor level. Seal these with flexible caulk.
- Gaps around pipes and conduit: Use a non-expanding, pest-resistant foam (look for foam with pest deterrents, or combine foam with steel wool) for any pipe penetrations in walls or floors.
Materials to use: Silicone caulk, copper mesh or steel wool, pipe escutcheons, expandable foam.
Bathroom: Moisture Attracts Pests
Cockroaches and silverfish are particularly drawn to bathrooms due to the consistent humidity. Drain flies breed in slow or standing drains.
Check and seal these areas:
- Around the toilet base and floor drain: Look for any gap between the fixture and the floor. Silicone caulk is ideal here.
- Under the vanity: Similar to the kitchen, check all pipe penetrations through the cabinet floor.
- Exhaust fan: Inspect the exterior vent flap to ensure it closes fully when not in use. A stuck or corroded flap is an open door for wasps and rodents.
- Tiled walls: Check for cracked or missing grout, especially in corners. Grout gaps can harbor cockroach egg cases and provide entry from wall voids.
Materials to use: Mold-resistant silicone caulk, grout repair compound, mesh vent covers.
Basement and Crawl Space: The Most Overlooked Entry Zone
According to the National Pest Management Association (NPMA), rodents and insects most commonly enter homes through the basement level and foundation. This area deserves the most thorough inspection.
Check and seal these areas:
- Foundation cracks: Even hairline cracks in poured concrete can allow insects and eventually rodents to enter. Fill with hydraulic cement for structural cracks, and polyurethane caulk for minor surface cracks.
- Sill plate junction: The gap where the wooden sill plate sits on the foundation is a classic rodent entry point. Check for gaps and seal with foam backer rod and caulk, or use copper mesh.
- Floor drains: Fit with a backflow-prevention drain cap that allows water out but blocks pests from coming up.
- Crawl space vents: These are necessary for moisture control, but the mesh can corrode or be damaged. Replace with 1/8-inch galvanized hardware cloth—this gauge is small enough to exclude mice, which require a minimum of 6mm to pass through.
- Utility penetrations (electrical, plumbing, HVAC): Every pipe or wire that enters from outside or below ground is a potential entry point. Seal all penetrations with pest-resistant foam or metal collars.
Materials to use: Hydraulic cement, polyurethane caulk, copper mesh, 1/8-inch hardware cloth, foam backer rod.
Garage: A Frequently Forgotten Entry Point
The garage is one of the easiest access points for pests because most homeowners focus on the interior of the home and ignore this transition space.
Check and seal these areas:
- Bottom of the garage door: The rubber door sweep deteriorates over time. Replace it if daylight is visible beneath the closed door.
- Side and top door seals: These weatherstripping pieces can compress or pull away, leaving gaps along the frame.
- Door to the interior of the home: This door should be treated the same as any exterior door—check the weatherstripping, door sweep, and threshold seal.
- Wall penetrations: Electrical conduit, water lines, and HVAC supply lines that pass through the garage wall need to be sealed at both entry and exit points.
Materials to use: Door sweep replacement kits, self-adhesive weatherstripping, expandable foam.
Attic: Where Wildlife Enters and Nests
Squirrels, raccoons, bats, and birds commonly enter through the attic. Once inside, they cause structural damage and create conditions that attract secondary pests like mites and beetles.
Check and seal these areas:
- Ridge vents: Check that ridge vent material has intact mesh backing. Damaged ridge vents are a common entry point for wasps and birds.
- Soffit vents: Inspect from both inside (with a flashlight) and outside. Look for detached sections or missing mesh.
- Gable vents: These should have intact louvers and interior mesh. Squirrels can easily gnaw through plastic louvers—consider replacing with metal-screened options.
- Where the roof meets the fascia: This junction can open up as wood shrinks seasonally. Seal with a combination of hardware cloth and exterior-grade caulk.
- Chimney cap and flashing: An uncapped chimney is a direct entry point for raccoons, squirrels, and birds. Install a spark-arresting cap with a mesh opening of ¼ inch or smaller.
Materials to use: 1/4-inch hardware cloth, exterior silicone caulk, chimney cap, galvanized flashing tape.
Exterior Perimeter: Your First Line of Defense
No interior sealing is fully effective if the exterior perimeter is ignored. Walk the outside of your home at least once a year with this checklist.
Check and seal these areas:
- Where utilities enter the home: Gas lines, electrical mains, cable, and internet connections all pass through exterior walls. Inspect every entry point.
- Window frames and sills: Wood window frames shrink and swell with temperature changes, creating gaps at the corners. Re-caulk with exterior-grade silicone annually.
- Door frames: Check the gap between the frame and the siding or brick. Even a small separation here can allow carpenter ants and mice to enter wall voids.
- Weep holes in brick veneer: These small openings are intentional for moisture drainage but can be entry points for insects. Use weep hole covers or fill loosely with steel wool—never seal them completely, as this traps moisture.
- Dryer vents: The exterior flap should close fully when the dryer is off. Rodents and birds nest in dryer vents with surprising frequency.
Materials to use: Exterior silicone caulk, weep hole covers, dryer vent guards, steel wool.
What Materials Work Best for Pest Exclusion?
Not all sealants are created equal when it comes to pest exclusion. Here’s a quick reference for choosing the right material:
|
Material |
Best Use |
Rodent-Resistant? |
|---|---|---|
|
Silicone caulk |
Gaps around windows, doors, fixtures |
No |
|
Polyurethane caulk |
Structural cracks, masonry |
No |
|
Steel wool / copper mesh |
Pipe gaps, foundation holes |
Yes |
|
Expandable foam (pest-grade) |
Larger wall voids |
Partially |
|
1/8″ hardware cloth |
Vents, crawl space openings |
Yes |
|
Hydraulic cement |
Foundation cracks |
Yes |
|
Door sweep kits |
Door bottoms |
Yes |
The key rule: use a rodent-resistant material (mesh or cement) as the primary filler, and use caulk or foam as a secondary sealant over the top. Rodents can chew through foam alone.
When Should You Call a Professional for Pest Exclusion?
DIY exclusion is effective for most standard situations, but some circumstances require professional-grade intervention.
Consider professional exclusion services when:
- You have an active infestation. Sealing entry points while pests are already inside can trap them in wall voids, leading to odor issues, secondary infestations, and structural damage.
- The access points are in hard-to-reach areas, such as a steep roofline, deep crawl space, or complex foundation system.
- You’ve found evidence of wildlife—raccoons, squirrels, or bats. These animals are subject to local wildlife regulations, and removal often requires licensed professionals.
- Your home has repeated infestations despite multiple rounds of sealing. This may indicate undetected entry points in wall voids or under the slab that require professional-grade inspection tools (such as thermal imaging or borescope cameras).
Professional exclusion services typically cost between $200 and $600 for a standard home inspection and sealing, according to HomeAdvisor (2023). This is substantially less than the average rodent extermination cost of $300–$550, and far less than the structural repair costs that can follow an untreated wildlife infestation.
How Often Should You Repeat This Inspection?
Seal once and forget is not a strategy. Homes shift, materials age, and new gaps form. The recommended inspection schedule is:
- Annually: Full exterior perimeter walk, attic inspection, and crawl space check
- Every 2–3 years: Replace or inspect weatherstripping on all exterior doors and windows
- After major weather events: Inspect the roofline, foundation, and exterior walls following significant storms
- When renovating: Any work that opens walls, floors, or the roof creates new entry points that must be re-sealed before the project is complete
The Bottom Line on Home Pest Exclusion
Pest prevention is a maintenance task, not a one-time fix. The homes that stay pest-free longest are the ones whose owners treat exclusion the same way they treat gutter cleaning or HVAC servicing—on a schedule, room by room, year after year.
Work through this checklist section by section rather than all at once. Start with the areas of highest risk: the kitchen, basement, and exterior perimeter. Invest in quality materials—specifically hardware cloth and silicone caulk rated for exterior use. And if you find signs of an active infestation, call a licensed pest management professional before sealing, not after.
A well-sealed home doesn’t just keep pests out. It’s more energy-efficient, better insulated, and structurally sounder. The effort you put in now pays off in more ways than one.
Frequently Asked Questions
What are the most common pest entry points in a home?
The most common entry points are gaps around utility pipes (plumbing, electrical, and HVAC), deteriorated door sweeps and weatherstripping, foundation cracks, and unscreened or damaged vents in the attic, soffit, and crawl space. Rodents most frequently enter at the sill plate—the junction between the wooden frame and the foundation.
How small a gap can mice enter through?
Mice can fit through a gap as small as 6mm (approximately ¼ inch)—roughly the diameter of a pencil. This is why mesh with openings larger than 1/8 inch is not recommended for exclusion, and why even hairline cracks in the foundation should be addressed.
What is the best caulk for pest exclusion?
Silicone caulk is the most durable option for indoor fixtures and window frames. For outdoor use and masonry, polyurethane caulk offers better adhesion and flexibility. Neither material is rodent-resistant on its own—always pack gaps with steel wool or copper mesh first, then seal over the top with caulk or foam.
Should I seal my home myself or hire a professional?
DIY sealing is effective for most standard gaps, cracks, and vents in accessible areas. Professional services are recommended when there is an active infestation, when entry points are in hard-to-reach locations, or when wildlife (bats, raccoons, squirrels) is involved. Sealing while pests are present can worsen the problem.
How do I keep pests out of my crawl space?
Replace any corroded or damaged vent mesh with 1/8-inch galvanized hardware cloth. Seal all utility penetrations with pest-resistant foam and mesh. Install backflow-prevention caps on floor drains, and inspect the sill plate for gaps annually. Vapor barriers also help by reducing the moisture that attracts insects and rodents.
What attracts pests to a home in the first place?
Pests are primarily drawn by three factors: food, water, and shelter. Kitchens and bathrooms are highest risk due to moisture and food residue. Cluttered garages and attics provide nesting material. Reducing these attractants alongside exclusion sealing gives the best long-term results.


